How to Insert a Sketch Picture in SOLIDWORKS (Step-by-Step Guide)

How to insert a Sketch Picture in SOLIDWORKS with a step-by-step guide for creating accurate sketch geometry.
SOLIDWORKS Tech

How to Insert a Sketch Picture in SOLIDWORKS (Step-by-Step Guide)
Sketch Picture in SOLIDWORKS is a powerful feature that helps engineers and designers create accurate sketches by using reference images. Whether you’re working with a hand-drawn sketch, a company logo, a blueprint, or a photograph of a component, Sketch Picture in SOLIDWORKS allows you to insert the image directly into the sketch environment and trace it with precision. For beginners and experienced users alike, Sketch Picture in SOLIDWORKS simplifies the sketching process, reduces manual effort, and improves design accuracy.

In this lesson, you’ll learn how to insert a Sketch Picture into a new part file, adjust its position, size, scale, rotation, and transparency, and use it as a visual reference to create sketch geometry. You’ll also explore best practices for organizing your sketches, ensuring a clean and efficient workflow while building accurate CAD models.

Table of Contents

Steps to Insert a Sketch Picture in SOLIDWORKS

Follow the steps below to insert a Sketch Picture in SOLIDWORKS, adjust its position, scale, transparency, and other settings, then trace the reference image to create accurate sketch geometry.

Step 1:

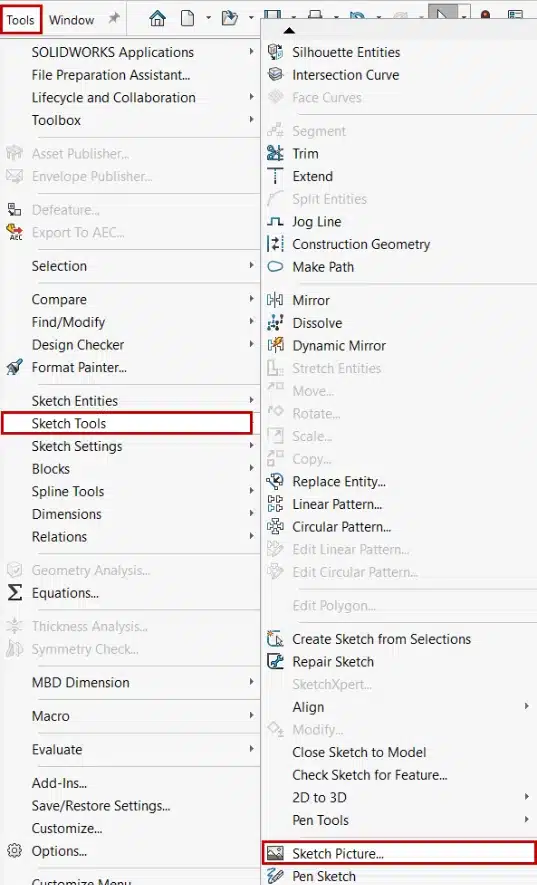
Begin bycreatinga new sketch on the Front Plane. Navigate toTools > Sketch Tools > Sketch Picture. In the dialogue box, browse and select the desired image file to insert. 

How to insert a Sketch Picture in SOLIDWORKS by navigating to Tools > Sketch Tools > Sketch Picture.

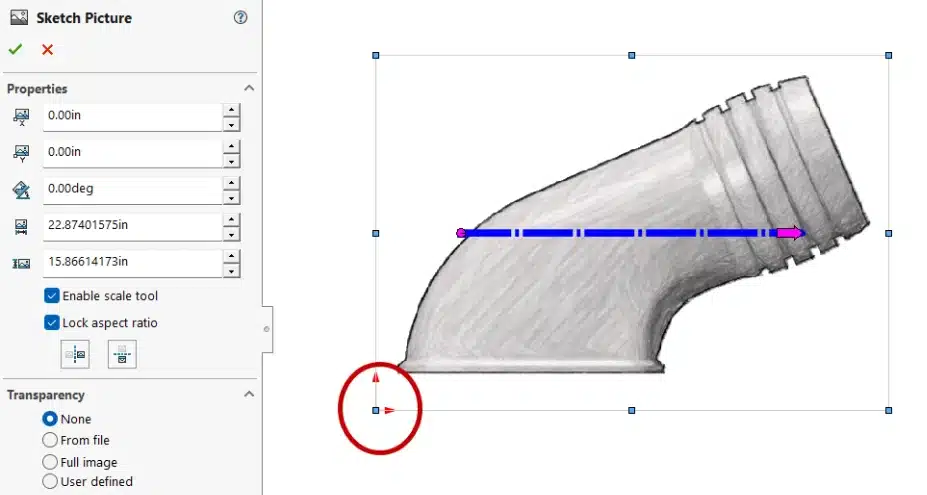
The image will be placed with its lower left corner at the origin, which can be adjusted using the PropertyManager. 

Sketch Picture PropertyManager in SOLIDWORKS used to adjust image position, scale, width, height, and transparency.

Step 2:

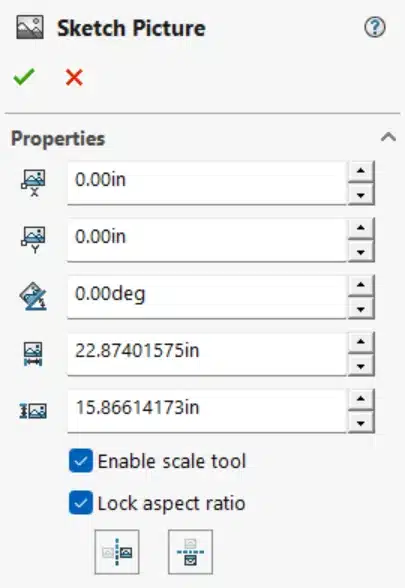
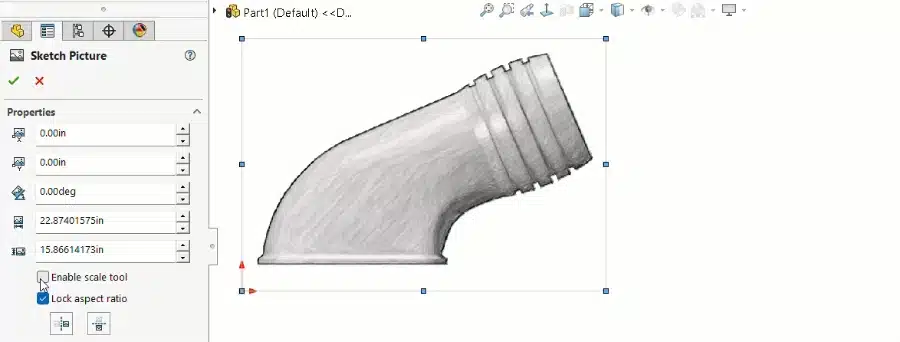
Use the PropertyManager to modify the OriginPosition, Angle, Width, and Height of the image. 

Sketch Picture PropertyManager in SOLIDWORKS showing image position, angle, width, height, and scale settings.

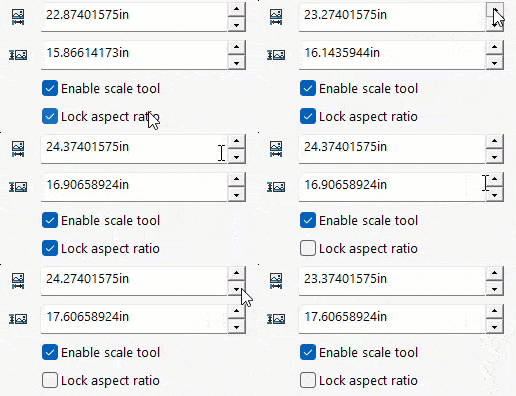
UncheckingLock aspect ratio option sets the Width &Height dimensions free from each other. 

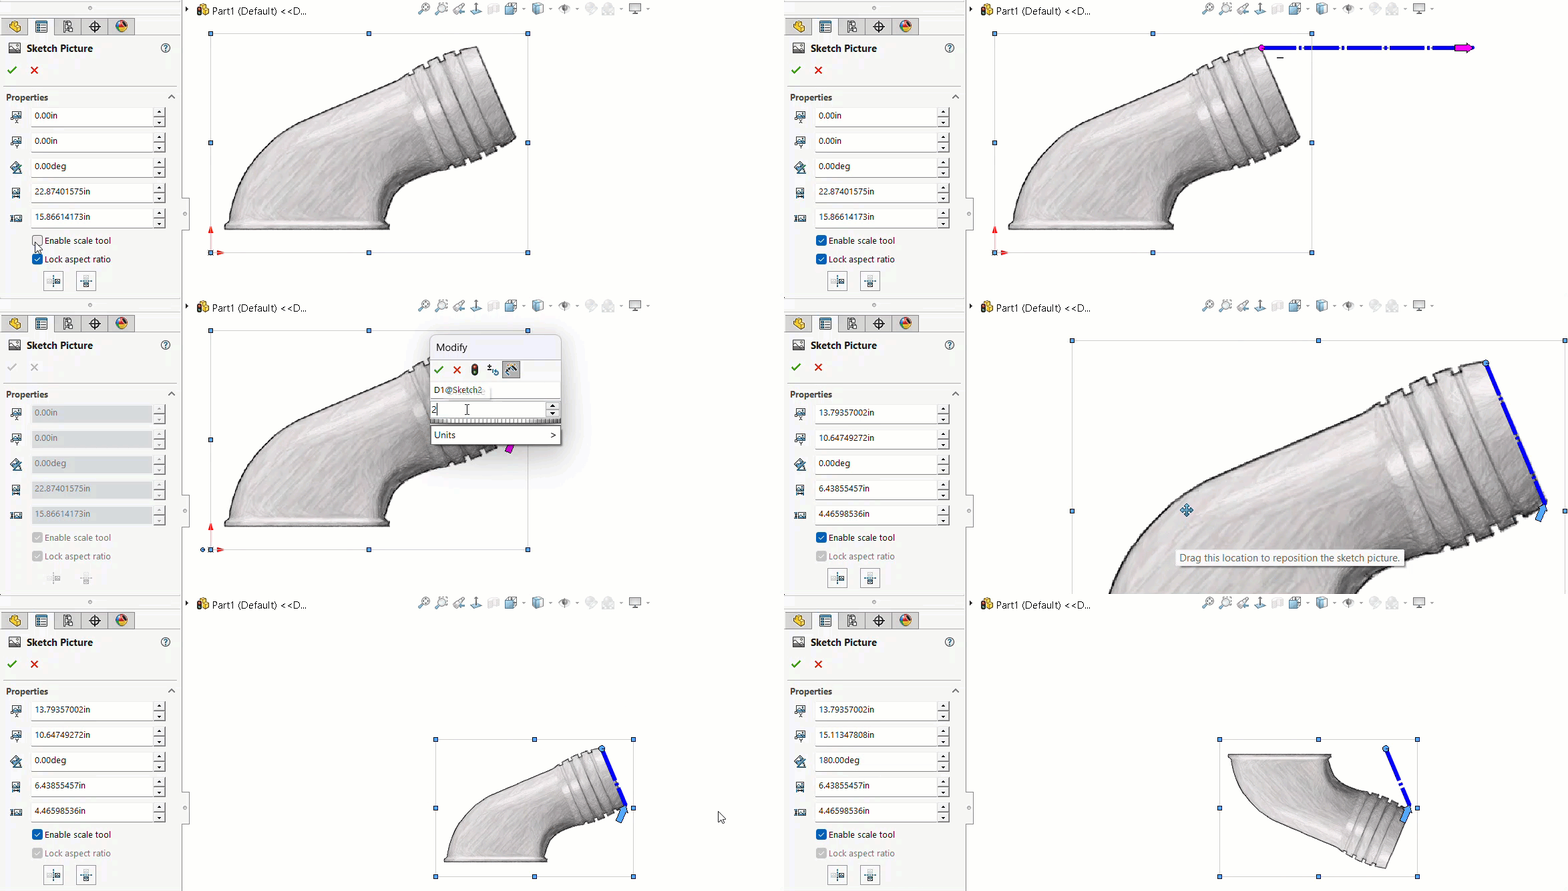
To scale the image, check the Enable Scale tool and adjust the scale by manipulating the dotted lineover a known dimension within the image. 

Use the Mirroringoptions to flip the image horizontally or vertically as needed. 

Step 3:

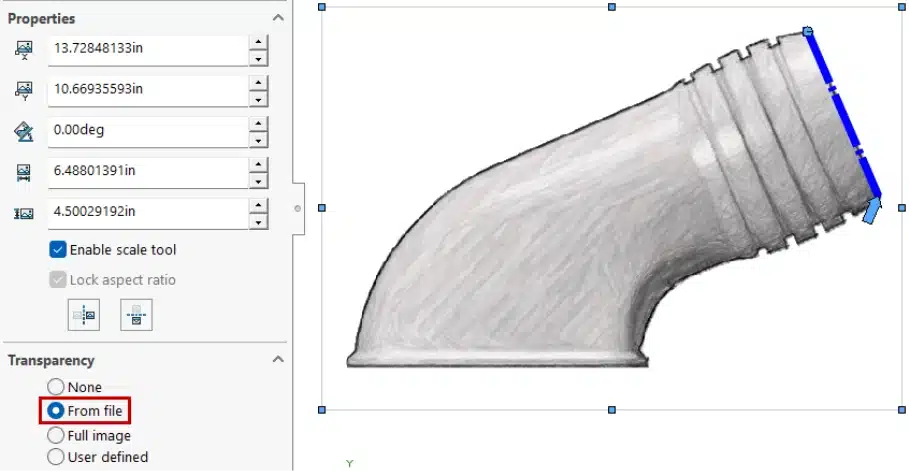
Adjust the transparency using the From File option for images withembedded transparency. 

Using the 'From File' transparency option in the Sketch Picture PropertyManager in SOLIDWORKS.

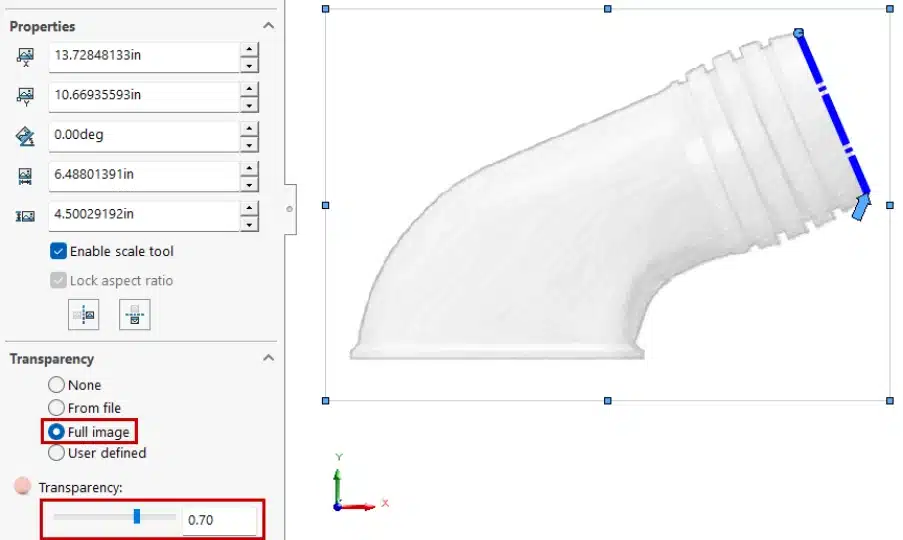
The Full Imagelets you adjust the slider or enter a value to set the transparency, but this applies to the entire image 

If you’d like to explore this topic further, you can also read our blog on SOLIDWORKS Tutorials: Advancement in Hole Wizard Tool.

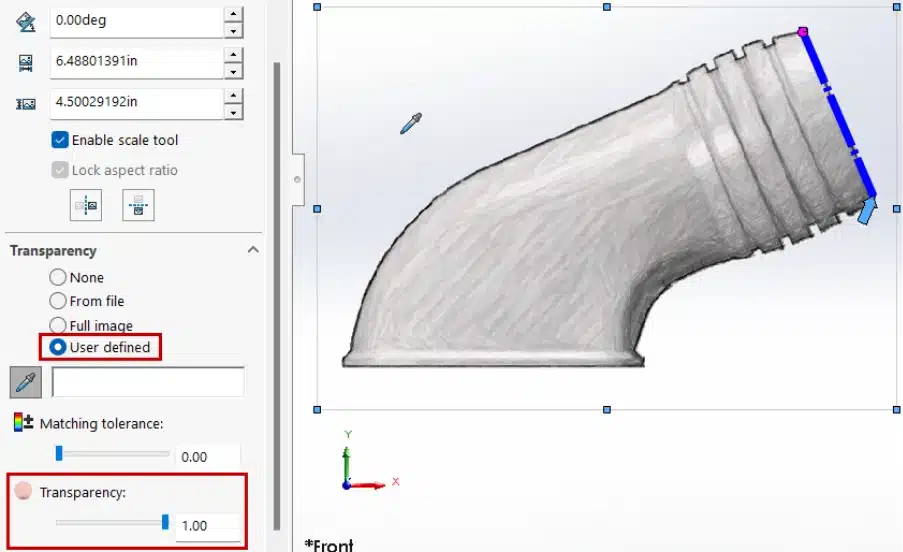
Youcanuse theUserDefined option for custom transparency to make specific colors transparent as well, with the help of eyedropper tool and adjust the Matching Tolerance.

Using the 'From File' transparency option in the Sketch Picture PropertyManager in SOLIDWORKS.

Step 4:

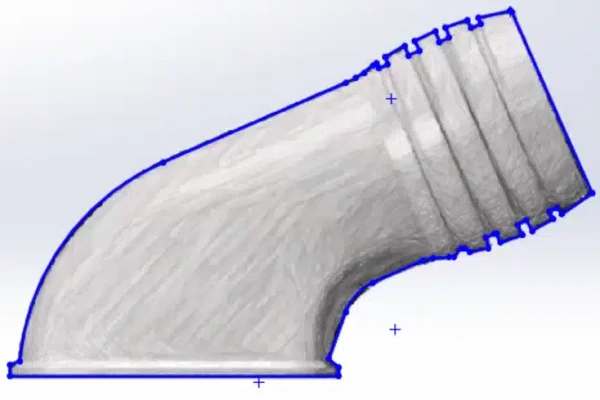
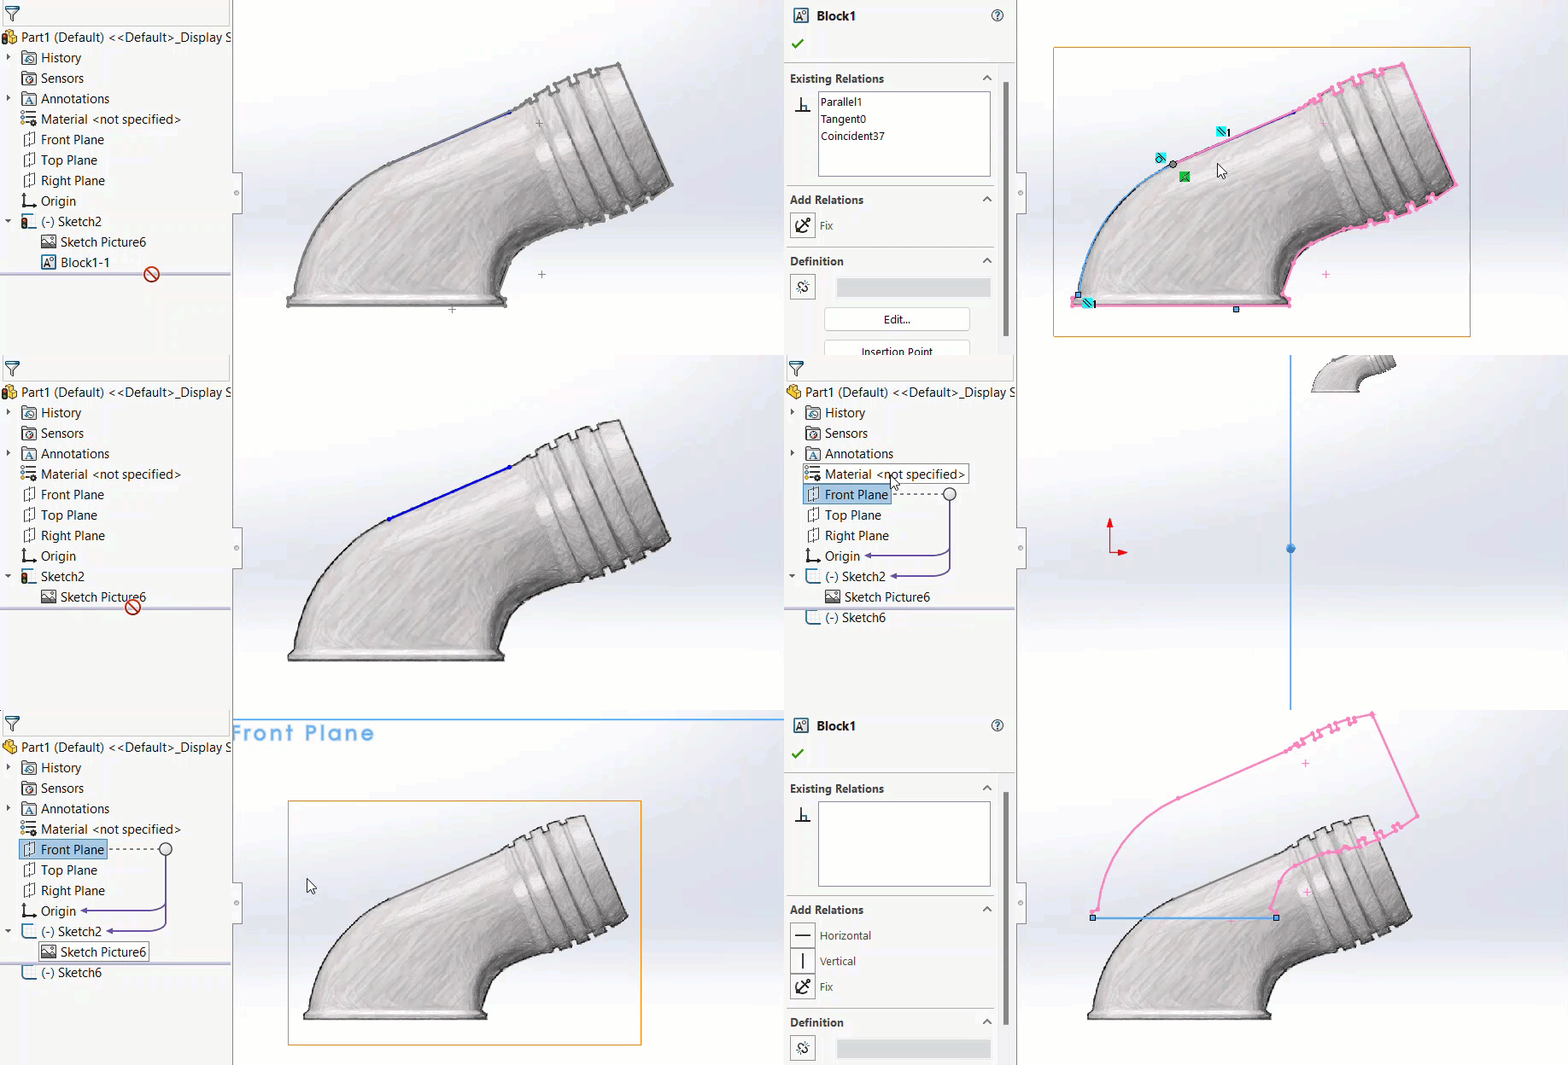
Once the sketch picture is set, trace over it using the available sketch tools. 

Tracing a reference image using Sketch Picture in SOLIDWORKS to create accurate sketch geometry.

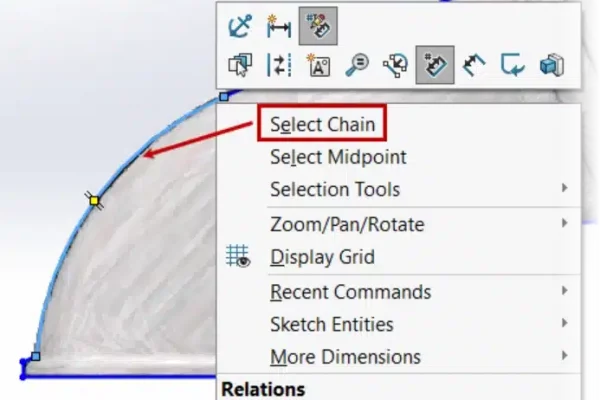
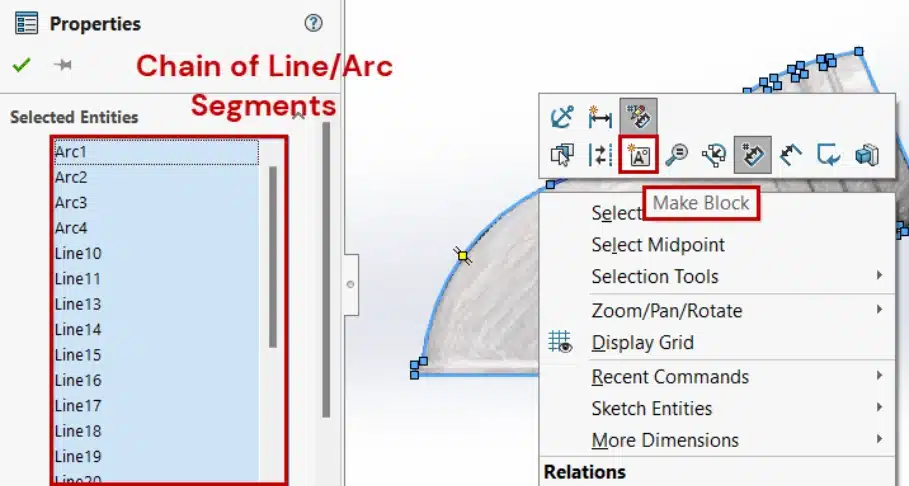
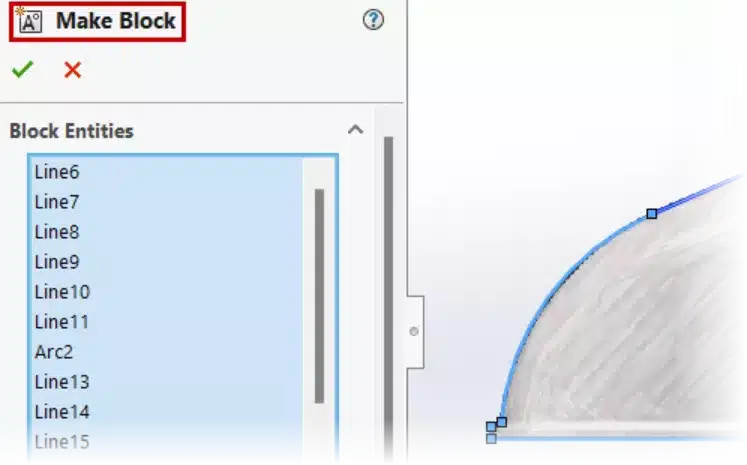
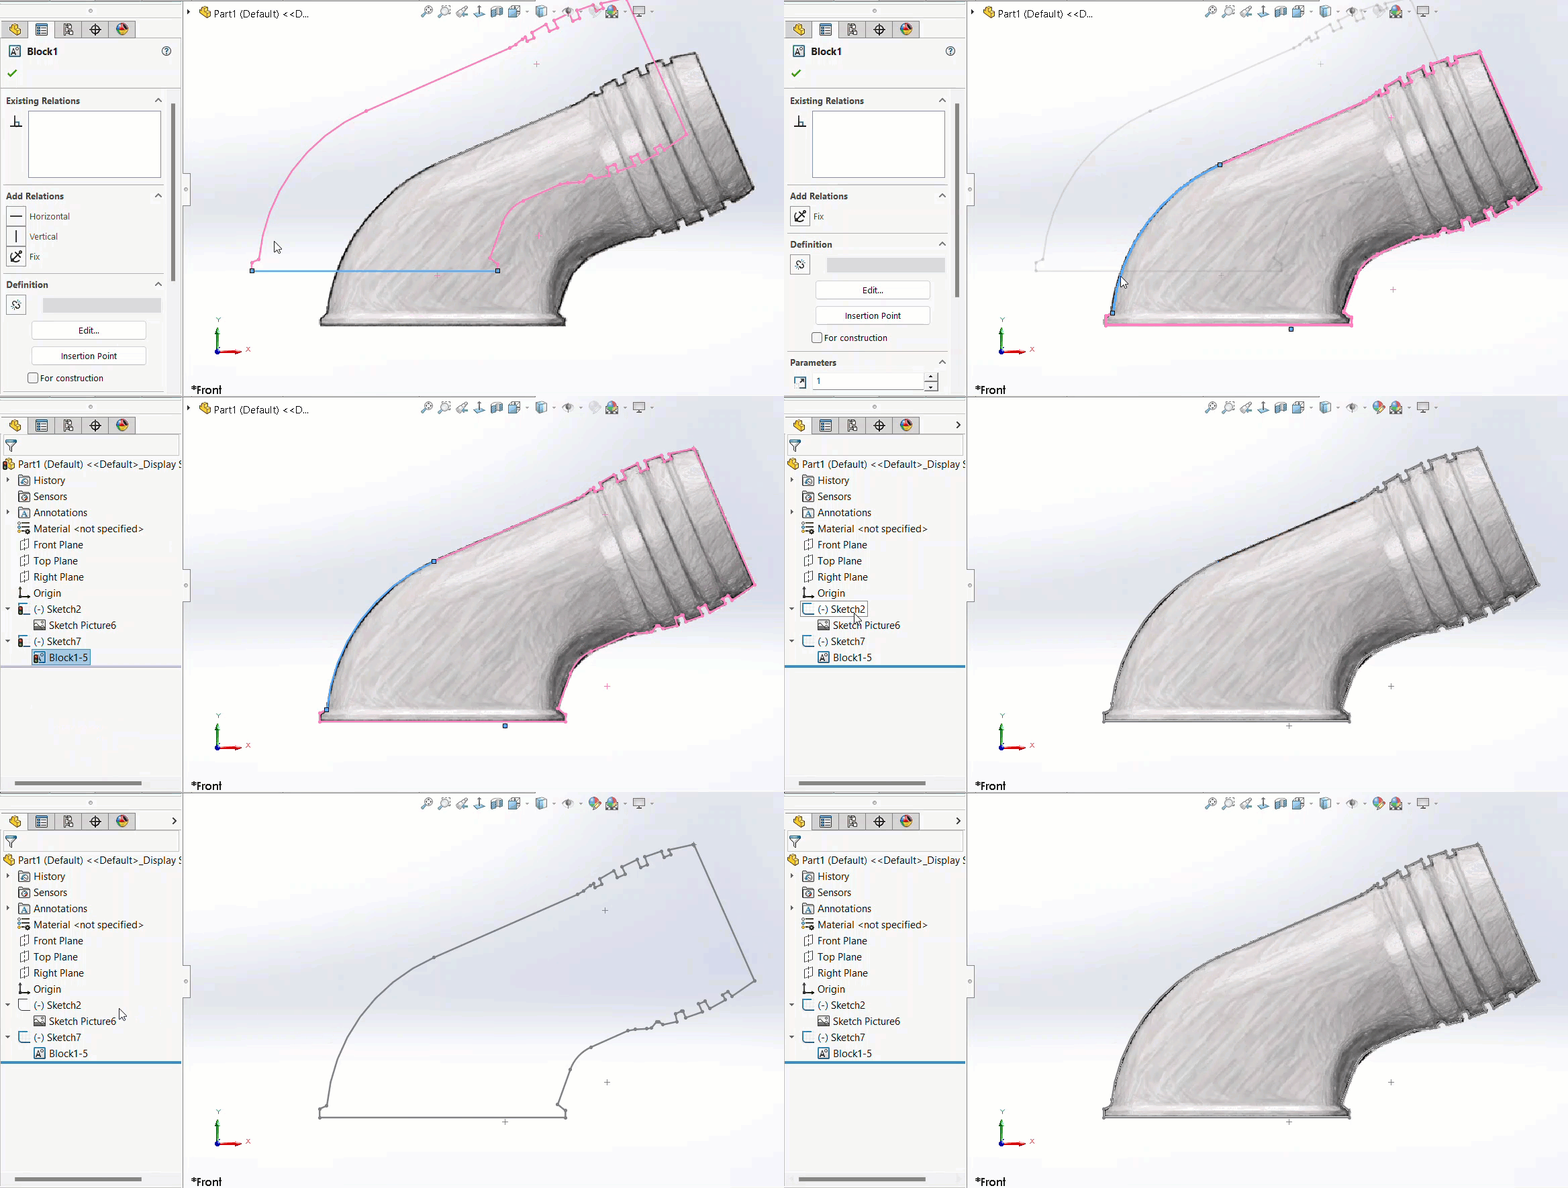
Use Select Chainto select the chain of line segments creating the sketch geometry & make a block of this geometry using Make Blockoption.

Using the Select Chain option in SOLIDWORKS to select connected sketch geometry created from a Sketch Picture.

Hint – Remember that the sketch picture serves only as a guide and does not support referencing, underscoring the importance of separating the sketch picture and geometry into different sketches for better control and organization. 

You may also be interested in our blog on Engineering CAD Drawing Views: Learn Basics, Types & Examples

Step 5:

To adjust the Sketch Picture, simply double-click on it to bring up the PropertyManager. Keep the SketchPicture and its related geometry in separate sketches to manage visibility independently. 

Editing a Sketch Picture in SOLIDWORKS and managing the reference image and sketch geometry in separate sketches.

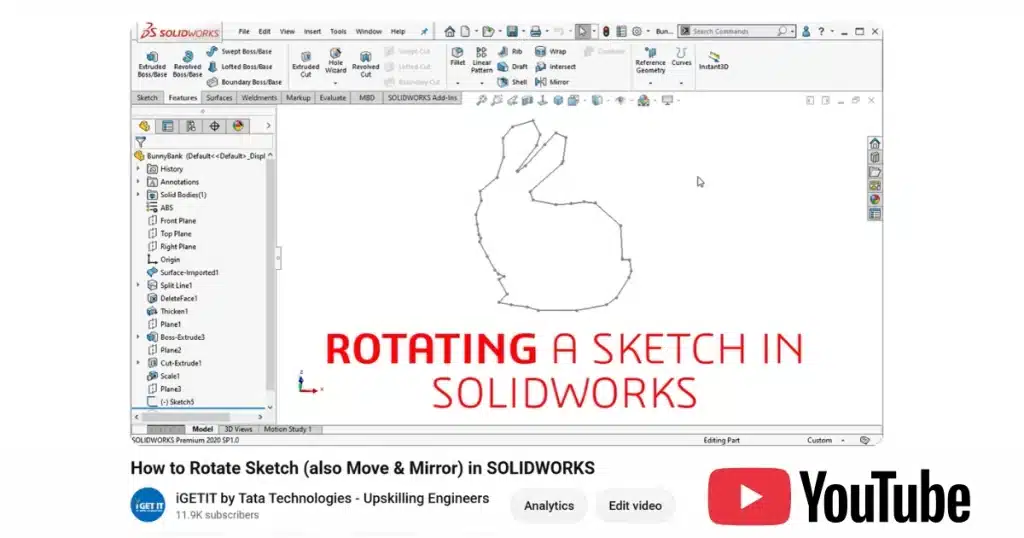
How to Rotate Sketch (also Move & Mirror) – SOLIDWORKS

If you’d like to continue learning SOLIDWORKS, you may also enjoy exploring our YouTube playlist, where you’ll find practical tutorials such as How to Rotate Sketch (also Move & Mirror) and many more tips to build your CAD skills.

Conclusion

Sketch Picture in SOLIDWORKS is a valuable feature for creating accurate sketch geometry from reference images. By learning how to insert a Sketch Picture in SOLIDWORKS, adjust its properties, and trace over it effectively, you can improve your sketching workflow and create precise CAD models with greater efficiency. Whether you’re a student learning SOLIDWORKS or a design professional working on real-world projects, mastering the Sketch Picture tool can help streamline the design process and improve productivity

Explore the SOLIDWORKS Certification Program by Tata Technologies

SOLIDWORKS CourseContact Us
Form Submissionggg
Image description
Fill in your details and Submit to Connect

Submit details and we will get back to you!!!

SME
Image description
Join our Author, Campus & Reseller Program

Submit details and we will get back to you!!!

Styled Form
Image description

Show your Interest

Submit details and we will get back to you!!!

SME
Image description
Join our Author, Campus & Reseller Program

Submit details and we will get back to you!!!

Form Submission
Image description
Tell Us Where to Send the Syllabus?

(Ensure popup is allowed for this site)

Submit details and we will get back to you!!!

Form Submission

Prioritize GD&T before diving into any design software

Invest in your future to
transform your Career path

Become a GD&T Expert
LMS
logo

Autodesk Training Subscription

1010

OR

Verify email

Start your 3 days free trial now


Already have an account? Sign In

By clicking the button above, you accept our terms of use and privacy policy.

LMS
logo

Autodesk Training Subscription

1010

OR

Verify email

(Ensure popup is allowed for this site)

Start your 3 days free trial now

Already have an account? Sign In

By clicking the button above, you accept our terms of use and privacy policy.

LMS
logo

Sign In

Have Organization Sign In?  Use Single Sign On

Don't have an account? Sign Up

OR

logo

Sign Up

Already a user? Sign In

Verify

(Ensure popup is allowed for this site)

OR


Have Organization Sign In?   Use Single Sign On

By Registering you agree to the Terms of Use and Privacy Policy.

logo

Single Sign On

If your company has single sign-on set-up with i GET IT, enter your company's web address to access your unique login page. The format needs to be as such: "domainname.com".

(Ensure popup is allowed for this site)

Not an enterprise user?Sign In
logo

Forgot Password

Enter your email and we'll send you instructions on how to reset your password.

logo

Password Expired!

Password and Authentication

To help keep your account secure, passwords must be updated every 90 days.Your current password has expired, so you'll need to create a new password before continuing.

Avail Offer Form