How to Replace Components | NX Assemblies

How to Replace Components in NX Assemblies
Siemens NX Tech

How to Replace Components | NX Assemblies

Overview

In this TechTip, we’ll explore the process of replacing a component in a 3D assembly with another existing part. This skill is vital for efficient design modifications. Follow these steps to seamlessly update assemblies open the assembly in your CAD software, locate the component to be replaced, right-click, and choose “Replace.” Browse and select the desired replacement part. Ensure proper alignment and confirm the substitution. This tutorial empowers CAD professionals, streamlining design workflows and fostering adaptability to changes in projects. Mastering this process enhances precision and agility, contributing to a more effective 3D modeling experience.

Download or open the Automatically Optimize resolved mode file, this may require active subscription and Please accept the cookies to see this video.

Step 1:

Open replace_components\replace_components.prt

Step 2:

Select Assemblies tab > Component group > More > Component gallery > Replace Component to display the Replace Component dialog.

Step 3:

In the graphics window, one of the ten instances of the component named engine_piston as indicated. (All 10 could be selected but is slower.)

Step 4:

Select the Select Part selection step in the Replacement Part pane.

Step 5:

Expand the dialog and the Settings pane and verify both Maintain Relationships and Replace All Occurrences in Assembly are active.

Step 6:

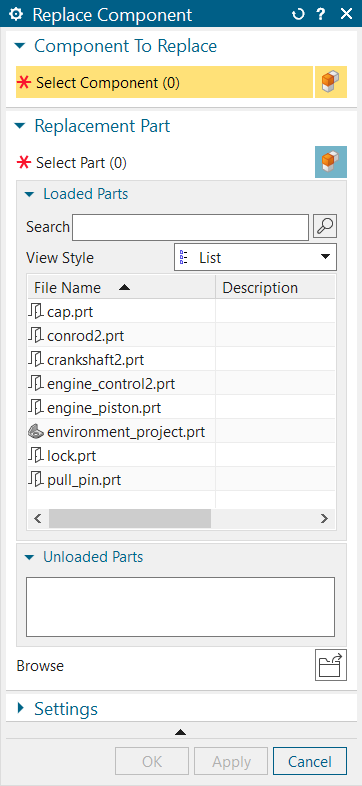
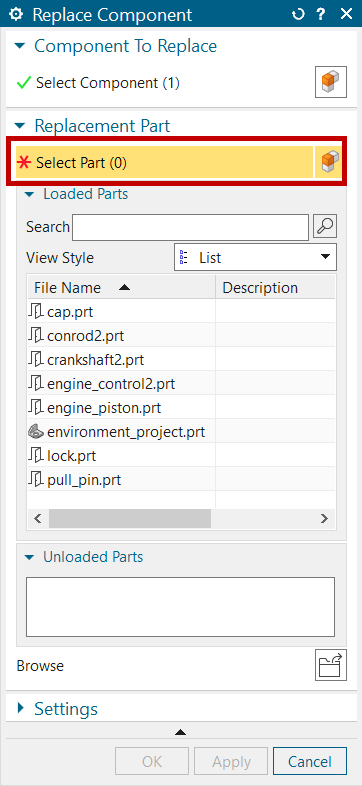
Click Browse and select the part named piston2.prt.

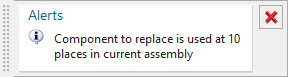
(An alert appears indicating all 10 components will be replaced).

Step 7:

Click OK to replace the components.

About i GET IT

i GET IT is our Tata Technologies eLearning solution designed to teach engineers how to be better in using today’s leading MCAD (Mechanical Computer Aided Design) applications and design skills.

For more tech tips and in-depth eLearning for NX, including this and new courses on other design solutions, please visit https://www.myigetit.com. You can sign up and get FREE Subscription of our informative Newsletter.

Start your Upskilling Journey Now! Visit our Plans Pages – https://myigetit.com/plans/

If you should have any questions, please reach out to iproducts@tatatechnologies.com or igetitsupport@tatatechnologies.com for help.

 If you like our Tech Blogs do share them using following share this post icon.

LMS
logo

Autodesk Training Subscription

1010

OR

Verify email

Start your 7 days free trial now


Already have an account? Sign In

By clicking the button above, you accept our terms of use and privacy policy.

LMS
logo

Autodesk Training Subscription

1010

OR

Verify email


(Ensure popup is allowed for this site)

Pay now, get full term access


Already have an account? Sign In

By clicking the button above, you accept our terms of use and privacy policy.

LMS
logo

Sign In

Have Organization Sign In?  Use Single Sign On

Don’t have an account? Sign Up

OR

logo

Sign Up

Already a user? Sign In

Verify

(Ensure popup is allowed for this site)

OR


Have Organization Sign In?   Use Single Sign On

By Registering you agree to the Terms of Use and Privacy Policy.

logo

Single Sign On

If your company has single sign-on set-up with i GET IT, enter your company's web address to access your unique login page. The format needs to be as such: "domainname.com".

(Ensure popup is allowed for this site)

Not an enterprise user?Sign In
logo

Forgot Password

Enter your email and we'll send you instructions on how to reset your password.