How to Create Stitch Weld in Weldments using Autodesk Inventor?
November 15, 2024 2024-11-19 17:38How to Create Stitch Weld in Weldments using Autodesk Inventor?
How to Create Stitch Weld in Weldments using Autodesk Inventor?
Welding is a critical aspect of mechanical design, ensuring structural integrity and strength. Autodesk Inventor offers robust tools to design and simulate weldments effectively, including the creation of stitch welds, which are commonly used for reducing heat distortion and material waste while maintaining strong connections. Stitch welds consist of intermittent weld segments along a joint and are especially useful in lightweight structures and automotive designs.
In this tech tip, we’ll guide you through the process of creating stitch welds in Inventor’s Weldments Environment, enabling you to streamline your workflow and enhance the accuracy of your weld designs.
Table of Contents
Steps to Create Stitch Weld in Weldments using Autodesk Inventor
Below are the step-by-step instructions and tutorial video to do creation of Stitch Weld in Autodesk Inventor Weldment enviornment:
Step 1:
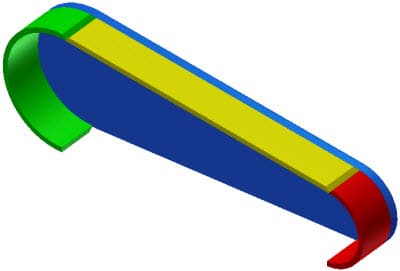
Open the file Stitch Weld Project.iam in the Stitch Weld Project folder from the location of your project files.
Step 2:
There are three ways to activate/edit the Welds environment:
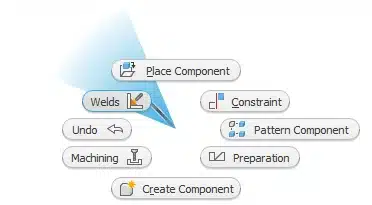
Right-click in the Graphics Screen and selecting Welds from the Marking Menu
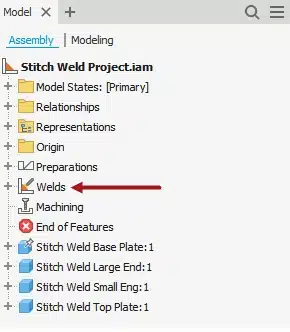
Double-clicking on Welds in the Model Browser.
Click Weld tab > Process panel > Machining on the Ribbon.

Step 3:
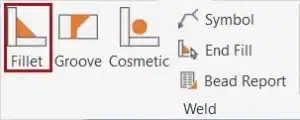
Start the Fillet Weld tool:
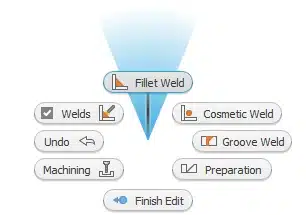
- In the Graphics Screen; right-click and select Fillet Weld from the Marking Menu.
OR
- Click Weld tab > Weld panel > Fillet
Step 4:
Use the Zoom and Pan commands.
Step 5:
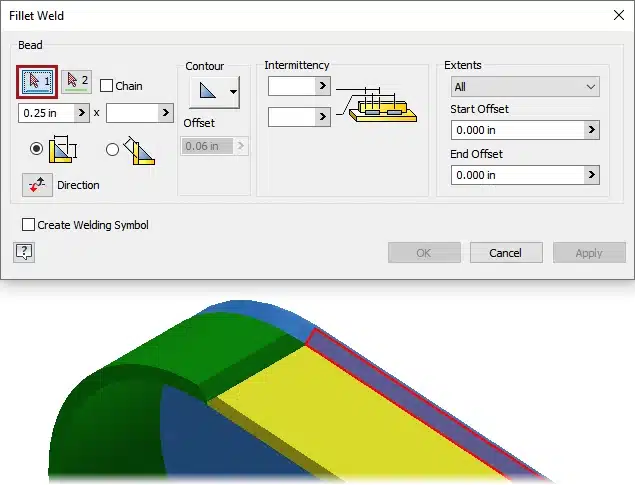
In the Fillet Weld dialog box:
- With Bead #1 active; select the face of the blue part as shown in the Graphics Screen as shown in this figure as the first set of faces for the Fillet Weld.
Step 6:
In the Fillet Weld dialog box:
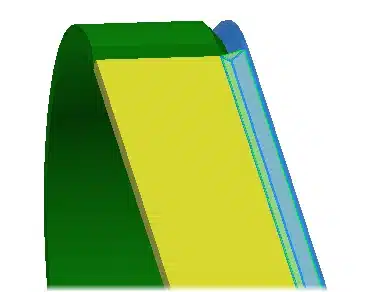
- Click Bead #2, then the face of the yellow part in the Graphics Screen as shown in this figure.

Notice that the weld bead preview is generated as faces are picked.
Step 7:
In the Fillet Weld dialog box:
- For Intermittency, Length; type in 3
- For Intermittency, Pitch; type in 6

Your model should now resemble the figure below.
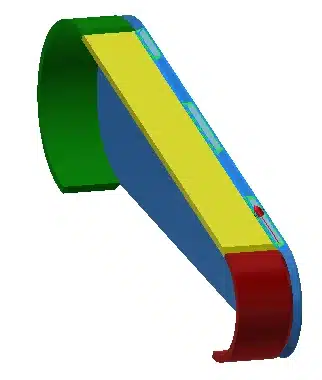
Click the Apply button to add the intermittent weld to your model.
Step 8:
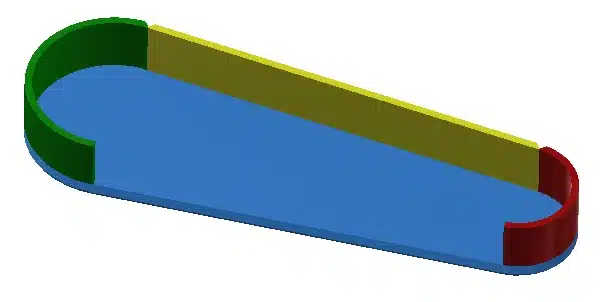
Use the Orbit or View Cube commands to rotate the view of your model so that you can see the “inside” face as shown in this figure.
Step 9:
In the Fillet Weld dialog box:
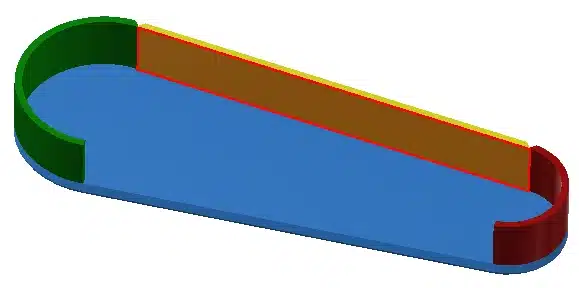
- With Bead #1 active; select face of the yellow part as shown in the Graphics Screen as shown in this figure as the first set of faces for the Fillet Weld.
Step 10:
In the Fillet Weld dialog box:
- Click Bead #2, then the face of the blue part in the Graphics Screen as shown in this figure.
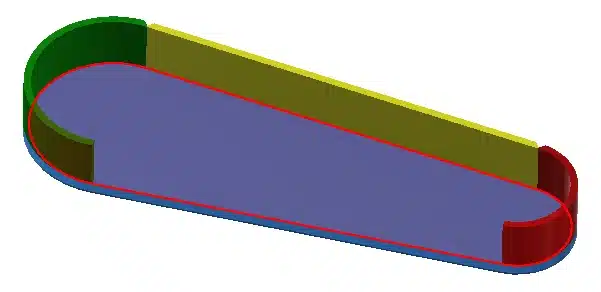
The weld bead should be previewed on the model with the intermittency values from the previous weld.
Step 11:
In the Fillet Weld dialog box:
- For Extents, Start Offset; type in 3
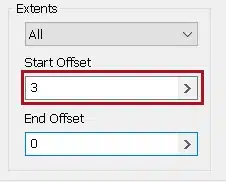
The weld bead preview will update and resemble the figure below:
- Pick the OK button to add the intermittent weld to your model and dismiss the Fillet Weld dialog.

The weld bead preview will update and resemble the figure below.
- Pick the OK button to add the intermittent weld to your model and dismiss the Fillet Weld dialog.
Final Thoughts
In conclusion, mastering stitch weld creation in Autodesk Inventor is essential for ensuring design accuracy, structural integrity, and manufacturing efficiency. This skill enhances your workflow and prepares you to tackle complex projects confidently, keeping you competitive in the evolving engineering and manufacturing landscape.
How to Master Autodesk Inventor?
Take your Autodesk Inventor skills to the next level with our expert-led courses at i GET IT by Tata Technologies. Our comprehensive training programs provide the guidance you need to master advanced design techniques and excel in your career. Start your journey to expertise with us today!
i GET IT by Tata Technologies is an online learning platform designed for mechanical engineers and designers. With over 2,000 courses, 8+ job role certifications, and 20+ domain topics, it’s your ultimate hub for engineering education. Our specialized certifications and personalized learning paths ensure that you gain both the knowledge and expertise needed to excel in your field.
Aditya Shete
Related Posts
What is Fluid Mechanics? – Introduction, Laws & Equations
What Is AutoCAD Software? Uses, Features & Practical Examples
Independent Front Wheel Suspension – Types, Benefits & Working
What is PLM? – Product Lifecycle Management [Detailed Guide]
Lead-Acid vs. Lithium-Ion Batteries: Key Differences & Best Uses
Find
Categories
Latest Posts
What is Fluid Mechanics? – Introduction, Laws & Equations
January 7, 2026What Is AutoCAD Software? Uses, Features & Practical Examples
December 18, 2025Independent Front Wheel Suspension – Types, Benefits & Working
November 10, 2025Popular Tags


